How to install Shopify CLI, the tool for developing Shopify themes

This article is an introductory book by our company on Shopify, Hello Shopify Themes: A Guide to Shopify Theme Development Here's an excerpt from .
introduction of development tools
Once the development store is ready, continue and install your developer tools.
If you’re not ready for a developer store, check out this article.
Getting Started With Shopify Theme Development
This section mainly discusses how to install the Shopify CLI, but we will also supplement Theme Kit assuming you have an opportunity to get in touch with unsupported themes for OS 2.
Shopify CLI
The Shopify CLI is a command line interface that supports theme development.
0 specification, we will use the Shopify CLI.
Getting Ready Before Shopify CLI Install
The requirements for installing the Shopify CLI vary depending on your operating system.
Be sure to check the official documentation for requirements.
Install Shopify CLI
https://shopify.dev/themes/tools/cli/installation
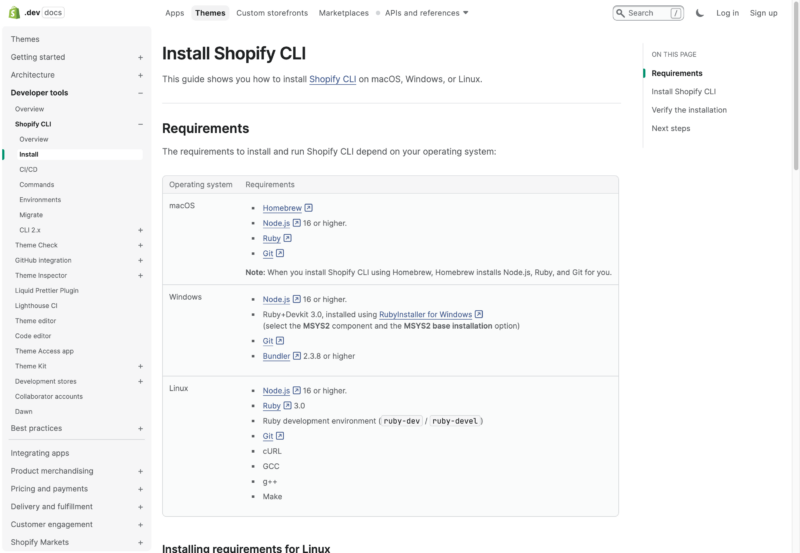
Install Shopify CLI Official Guide
The book introduced the installation procedure for Ruby and rbenv based on Shopify CLI 2. x type requirements, but as of 2023 it is different in Shopify CLI 3. x type.
In this section, we will prepare for installation in MacOS environment and introduce Homebrew.
Installing Homebrew
Homebrew is a package manager used in MacOS.
For MacOS, Homebrew allows you to install Node.js / Ruby / Git which is required for Shopify CLI operation as well.
1. Check if Homebrew is installed
First, open the command line tool and type in:
brew -v2: Installation update for Homebrew
If the version number is not displayed, install it based on the guidance of Homebrew official site.
Open the terminal, type in a command under "Install" and follow the installation instructions.
Homebrew official website
https://brew.sh/index_ja
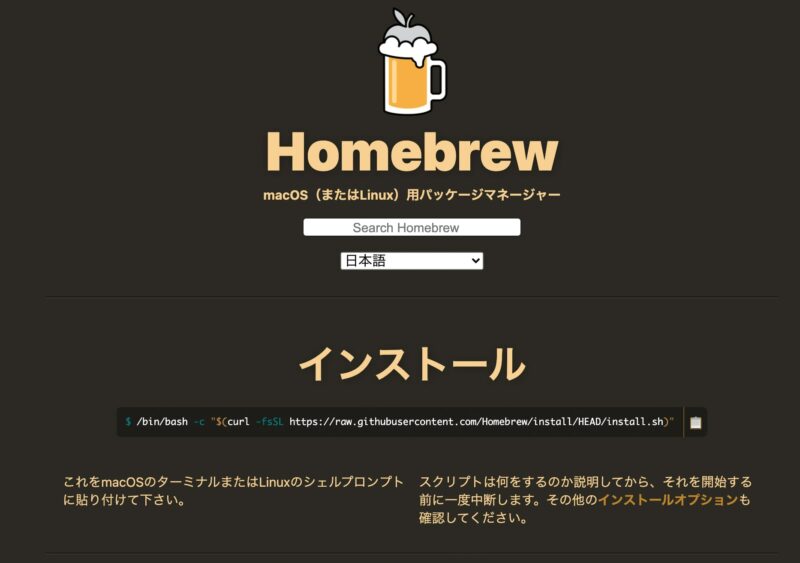
HomeBrew Official Site Installation Section
If you have already installed Homebrew, let's update it by the following command.
brew updateIf you fail to update with MacOS Monterey, try the following command:
brew update-resetwhen Homebrew doesn't pass
When Homebrew is installed, the following Warning statements may be displayed depending on your Mac's environment.
Warning: /opt/homebrew/bin is not in your PATH.
Instructions on how to configure your shell for Homebrew can be found in the 'Next steps' section below.
You can't execute Homebrew commands as it is, and the necessary commands for the "Next steps" section in the message on your terminal will be shown.
Now you are ready to install the Shopify CLI on your MacOS environment!
If you have a Windows or Linux environment, please use the official documentation mentioned above to set up your environment.
Installing the Shopify CLI
Once you’re ready, installing the Shopify CLI is easy.
On MacOS, type the following commands:
brew tap shopify/shopify
brew install shopify-cli
On Windows and Linux, npm is used.
npm install -g @shopify/cli @shopify/themeIf you see the version of Shopify CLI in the following command, your installation is complete!
shopify versionConnecting the Shopify CLI and Store
Let’s use the Shopify CLI to work with our developer store.
For example, type the following command: xxxxxx.myshopify.com The domain part should be rewritten into the domain of the development store you just created. .myshopify.com Parts can also be omitted.)
shopify theme list --store xxxxxx.myshopify.com When executed, you will see the Shopify login page on your browser.
Log in to Shopify with the partner account you used to create your development store. Logged into store xxxxxx.myshopify.com... (Abbreviated) If you see a word, the login is complete. The page in your browser closes and there's no problem with it. When you log in successfully, the theme information of the partner store will be displayed on the terminal. --store xxxxxx.myshopify.com If you are flagged, the command you type will be fine with anything else.
Creating a New Theme with the Shopify CLI
Next, create a new theme for your development.
in the directory you want to create a theme folder cd Please move with a command.
cd [作業ディレクトリへのパス 例:/Users/xxxx/sample] If you can move to a directory that creates the theme folder, shopify theme init Enter a command.
shopify theme initYou will be asked the theme name, so enter any name and decide it with an entertainer.
Theme name
> dawn-sample

//成功すると以下メッセージが表示されます
┏━━ Cloning https://github.com/Shopify/dawn.git into dawn-sample… ━━━━━━━
┃                                                                           100%
┗━━ ✓ Cloned into dawn-sample ━━━━━━━━━━━━━━━━━━━━━━━━━━━━━━━━ (1.84s) ━━
Now a copy of the Dawn theme will be created on your computer.
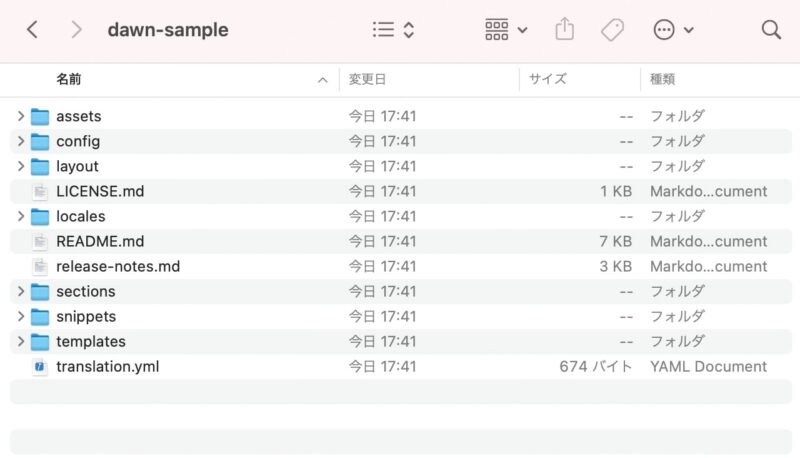
Locally replicated Dawn themes
If you use an existing theme,
If you use a theme that already exists locally, cd It is OK if you move to the subject with a command and use commands.
If an existing theme exists only remotely (on a Shopify server or on a GitHub remote repository) shopify theme pull command? shopify theme init in --clone-url By adding a flag, you can get the theme remotely.
Check your development themes in a local environment
cd Go to the development theme directory with a command, and execute the following command while connected to the Internet.
shopify theme dev it takes a little bit of time, but once the theme is synchronized http://127.0.0.1:9292 You will receive a message that tells you to access Google Chrome.
The development theme is displayed on the browser as follows.
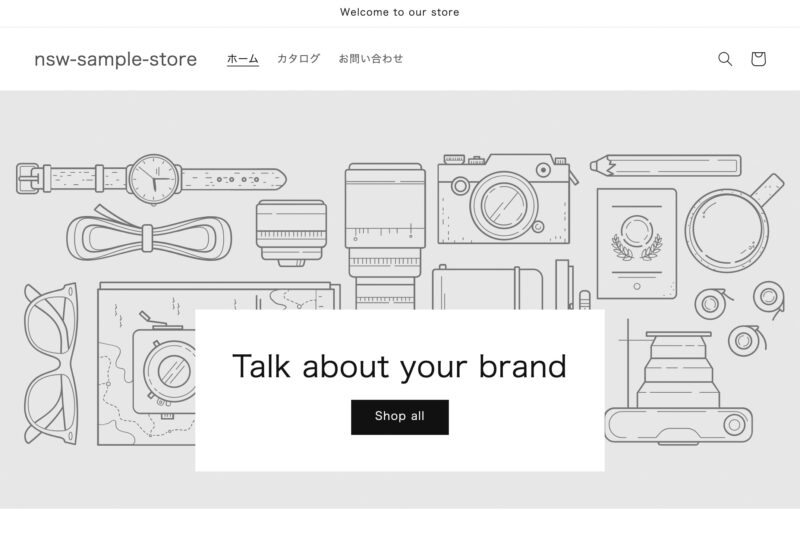
development theme display
As you can see from the theme management screen of the development store, this development theme is not displayed on the theme library.
Contents such as product data are referenced directly from the development store, and you can proceed with development while checking the display of content in a local environment.
The following section “Hello World in the Shopify CLI” explains how to reflect files edited with development themes into a theme library: If you want to edit this theme on the theme editor or share previews with third parties, each link is displayed on the command line so please use it.
Development themes that haven’t been operated for 7 days will be automatically removed, and the preview link will also be disabled. The Shopify CLI environment is complete! Chapter 3 of Dawn theme customization will be based on development environments we have built in this chapter.
Theme Kit
For older themes that do not meet the OS 2.0 specification, or for those that introduce development flows with Theme Kit we will use Theme Kit.
As the use of Shopify CLI is expected to become central in the future, the introduction of Theme Kit will be a supplementary reference.. In this section we assume that there are already themes available for modification on store + when Theme Kit is first introduced.
If you are participating in the development of a theme that is already being developed on Theme Kit or versioned at GitHub, please follow the development site workflow to create and acquire themes.
Theme Kit Installation: Windows
Please introduce the package manager Chocolatey in advance.
Chocolatey - The package manager for Windows
https://chocolatey.org/
choco install themekitTheme Kit Installation: MacOS
Install it on HomeBrew, and the introduction of HomeBrew is mentioned in the Shopify CLI description.
brew tap shopify/shopify
brew install themekit
Theme Kit Access App Publishes Passwords
Add the Theme Kit Access app to a store that you want to use Theme Kit for issuing passwords.
In the case of a development store, it is an owner itself so there is no need to approve when installing apps.
When you register the email address of a user using Theme Kit on your app, you will receive an e-mail for issuing passwords. Follow the steps in the mail to get your password. Since it can only be displayed once at the time of issue, make sure that you copy and hold it. If you have failed to save, please reissue it.
Password Issuance in Private Apps
In the past, Theme Kit passwords were obtained using a private Shopify app.
Currently, password generation by Theme Kit Access app is recommended.
creation of a theme for development
Open the theme library page of the store management screen, and "replica" the theme to be repaired for work from "Action".
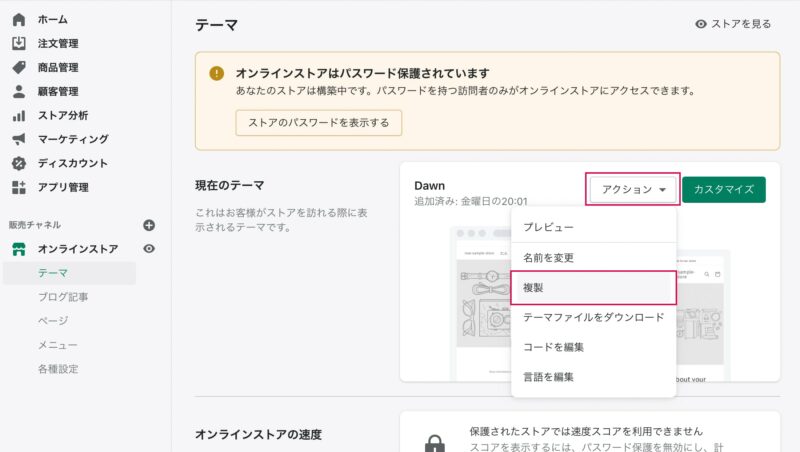
Run a replica of the theme from Action.
In order to get a theme ID, let's access the theme editor screen of the duplicated theme.
on the theme editor screen URL. your-store.myshopify.com/admin/themes/xxxxxxxx/editor I think that the part, several digits are displayed. xxxxxxxx The number of the part is a theme ID. Let's refrain from holding it in hand.
Getting a theme with Theme Kit
Create a directory that you want to save the theme file cd If you move with a command, run the following command:
[your-password] is a password you just got in the Theme Kit Access app [your-store.myshopify.com] is the domain of a store, [your-theme-id] Please replace it with the theme ID that you have previously reserved.
theme get --password=[your-password] --store="[your-store.myshopify.com]" --themeid=[your-theme-id] Now, the theme will be downloaded locally from Shopify’s Theme Library.
This is how Theme Kit’s environment is built.
For the command and development flow of Theme Kit, please refer to chapter 6.
Click here to purchase the introductory book on Shopify theme development that we produced at our company.
We do not have any plans for printing after the sale at this time, so if you would like to read a printed book please pick us up as soon as possible.

- Author: Sayaka Kawashima
- Publishing: Non-standard world, Inc.
- Number of pages: B5, 248
- Price: 3,850 yen (tax included) * Packed with PDF version, free shipping