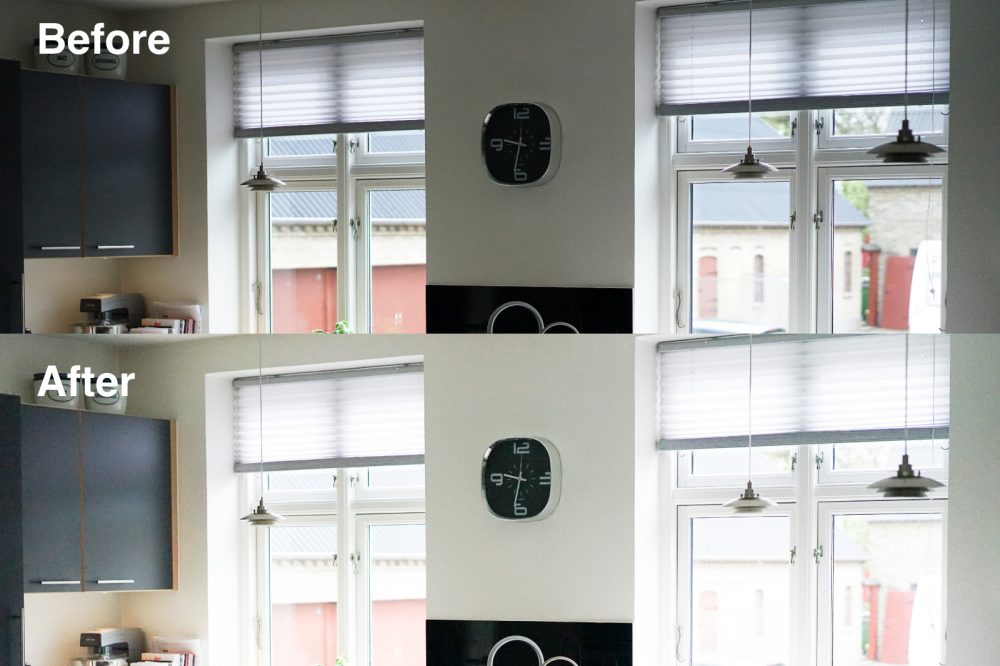
Before applying filters: The basics of photo retouching

"Where should I do the photo editing?"
If you're a camera beginner, do you have any questions or concerns? There are useful filters like VSCO. There's a basic adjustmentthat you have to do before you filter it on. 。
Our company regularly holds in-house study sessions, and this time we will introduce “Introduction to Photo Retouch” as I learned the points when editing photos manually without using filters.
Contents [ hidden display ]
Adjustment is divided into two parts!
Our art director Sato taught us, and this time we will use Adobe Lightroom.
Since the performance of cameras has been improving in recent years, there are many cases where retouch is not required, but since it is a situation that makes it easy for the camera to misunderstand, we will focus on it and do editing work.
it's a big deal, white balance and exposure. Yes.
1. Adjustment of white balance
First, adjust the white balance.
on the premise that it's indoor, outdoor or fluorescent lighting There are various colors of light (not the same color) It’s important to remember that while the human eye is automatically corrected, the camera can only recognize if it doesn’t set up so you need to adjust your color by adjusting white balance.
White balance is an adjustment to make the white look neatly white. check if the entire picture is reddish or green I'll do it.
Let's use "Color Cover Correction."
For example, this photo is slightly green in color; wearing means that the colors are biased.
<Before>
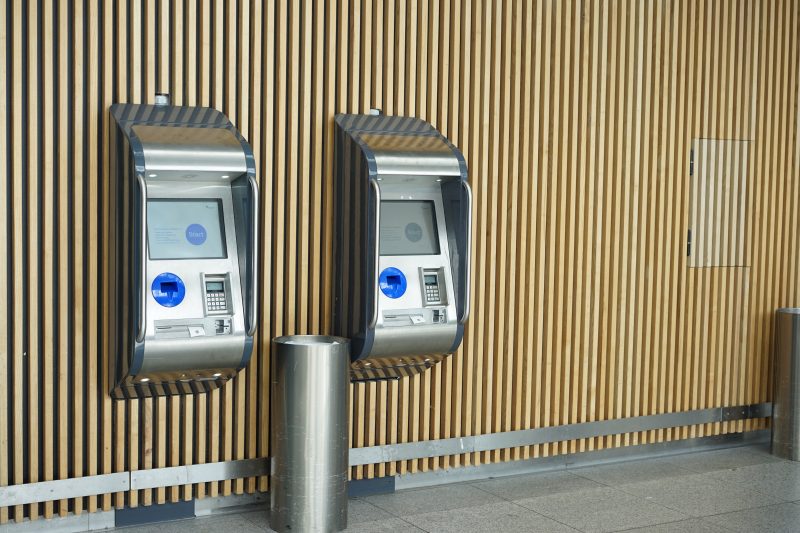
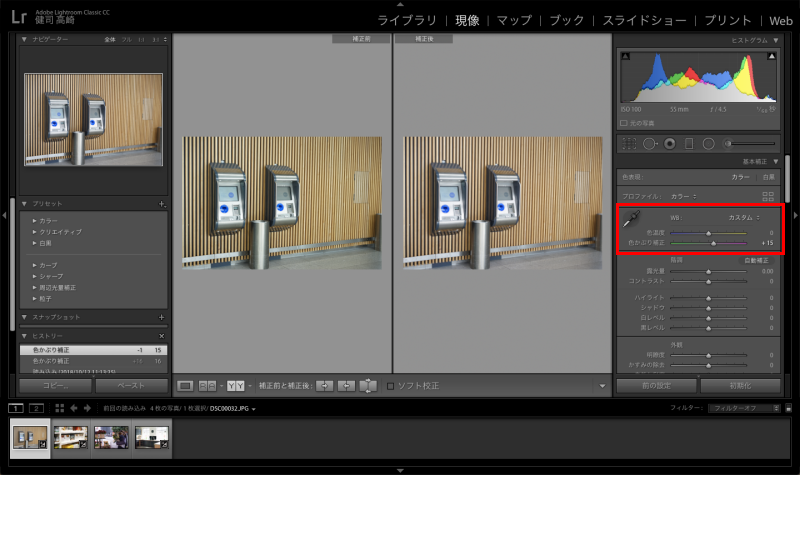
and adjust it with color correction. Color coverage correction can be adjusted by adjusting the green and magenta values.
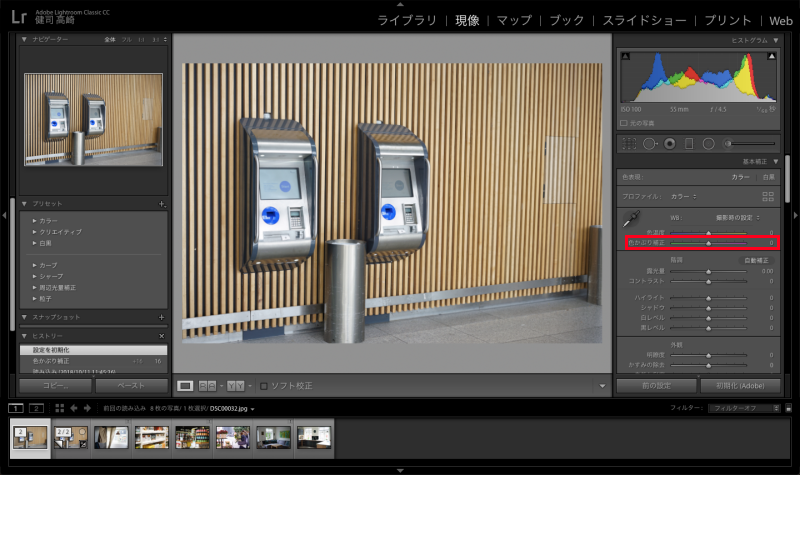
This time it was green, so I strengthened the magenta, and then the whole screen got out of green to make a clearer impression, as well as approaching color when actually looking at eyes.
<After>
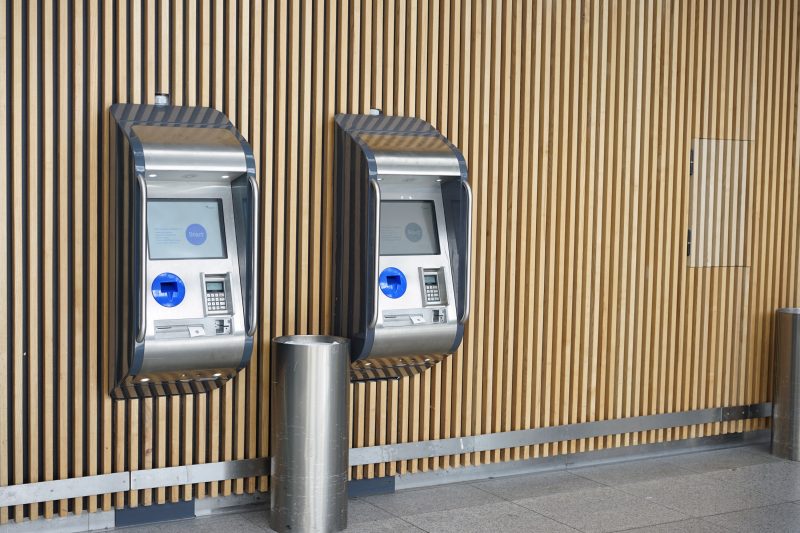
As a work of art, we sometimes intentionally put green on it, but I recommend that you adjust the actual color first.
Let's use the Spot Tool.
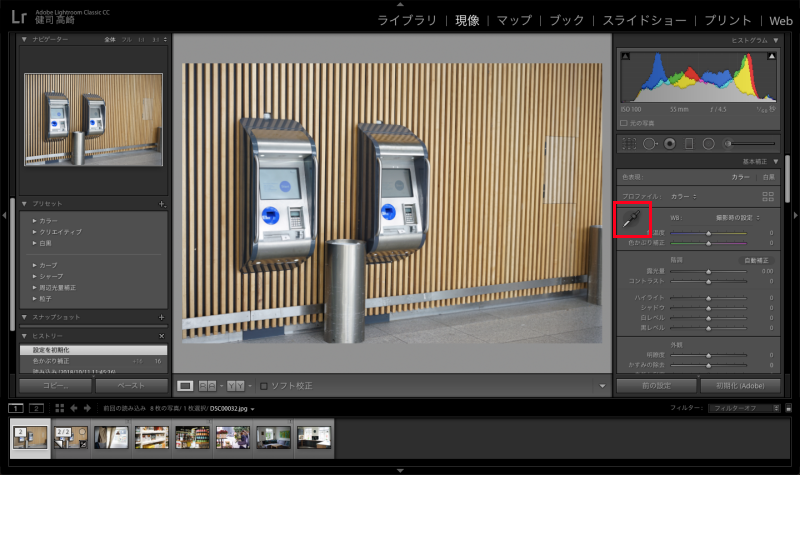
For those of you who can’t judge whether the photo is reddish or blue with your own eyes, we recommend a white balance adjustment method using “Spoit Tool”.
Select Color Expressions > Spot Tool and click on the gray part of your screen to correct the whole color based on that, but there are a few places where you can say grey so let's try some and get closer to what it looks like when you actually see it.
You can check the number by color coverage correction, and since magenta is +15 as a result of manually adjusting earlier, you will see that it was still a green photo.
2. Adjustment of exposure
The next step is to adjust the exposure, or brightness.
and as a common pattern a white screen, or an outside light coming in from the window or a picture of a backlight is often darker than it really is. Because white is a color reflecting light, the camera misunderstands it as “light!” and sets it to be darker than you’d actually see.
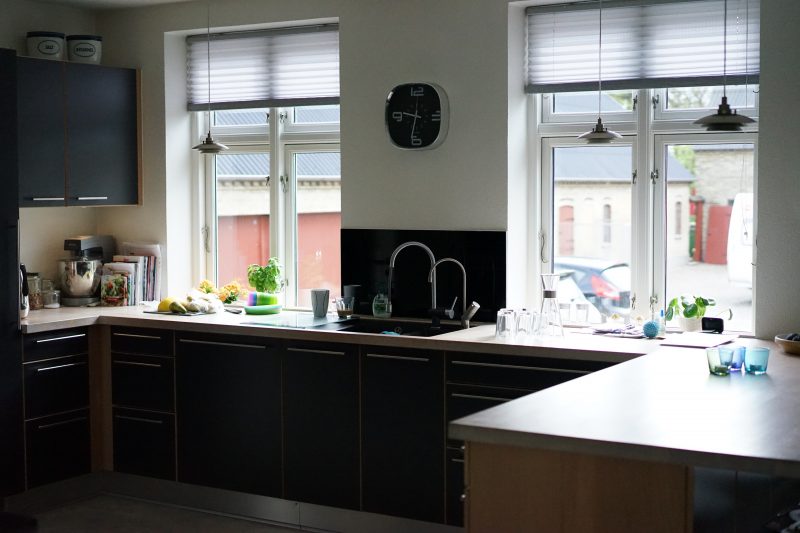
For example, here's a photo. Exposure is right outside the window, but the focus of the picture is in the room. Because it's a photograph you want to take inside, let's also give exposure according to indoor brightness in this case.
<Before>
the brightness is adjusted by gradation and exposure. Let's raise the number a little by one and turn it on.
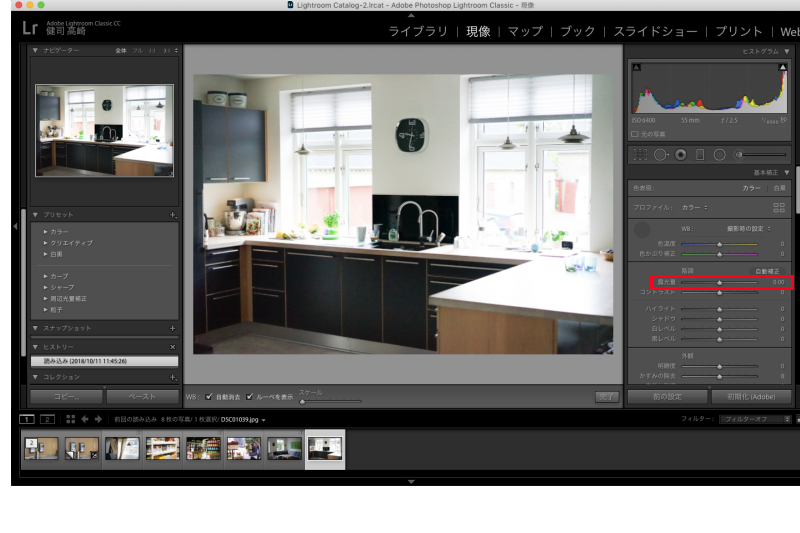
<After>
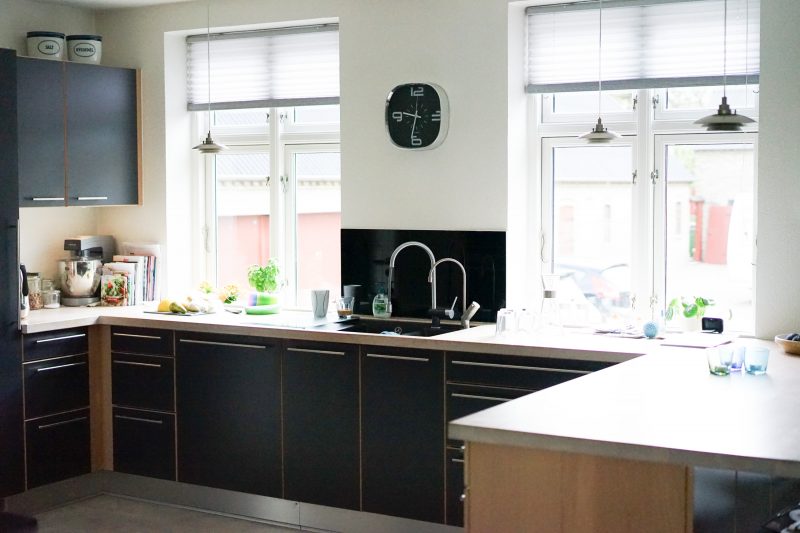
If there’s a lot of white on the screen, it will also be darker than real colors—for example, in the photo below:If you give “+0.
<Before>

<After>

The key is to adjust the color and brightness of a camera while placing it in one corner of your head. Yes.
In addition, if you want to create a tasteful atmosphere as a finish, it is also good to apply filters such as VSCO. First of all, adjusting to the correct and clean condition will make the filter ride better, making it a better photo. 。
it's a virtual copy.
It's easy to get into a situation where you understand the retouch point, but it's getting less and less obvious when you continue to work. The best way to do that is to compare virtual copies before and after editing. Select photos and right-click on "Virtual Copy"
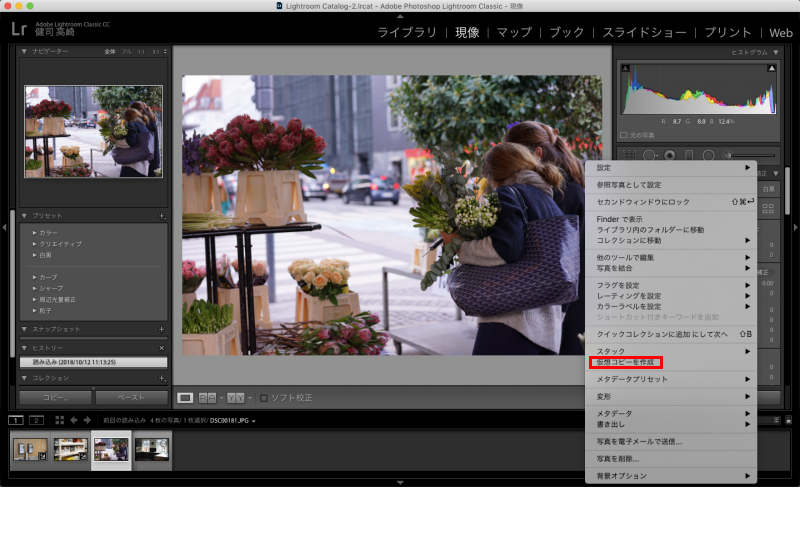
Since adjustment is a subtle difference, it should be useful as judgment and consideration material when working while comparing.
If you want to do the editing before you put on a filter, this is like applying base cream with makeup. You don't apply undercoat and there will be a difference in the glue or collapse of makeup (sweat). To make it better, set up your base! This looks like both makeup and photography are the same!
I hope this article will help you in your camera life.
Photocooperation: we love yoko