
Shopify and Gatsby’s Headless Commerce is ready for the next generation of EC technology

Hello, I'm engineer Kawashima.
the other day, we got our own publishing label The online store of yori.so publishing and... Renewal of Headless Commerce Site I did.

The speed of display is characteristic:)
With this renewal, we have gained a lot of knowledge about building headless commerce.
As for the advantages, disadvantages and technology stack of building headless commerce, our representative Takasaki has published the following commentary article.
As mentioned in the article, as of March 2020 there is still not much Japanese information about building headless commerce.
In this article, from the perspective of an engineer involved in the implementation, I would like to give you a summary of building headless commerce and points that are often asked when implementing it in a serial format.
If you’re looking for information about building headless commerce, I hope it helps.
The contents of the series are planned below.
First: Introduction and Environment Construction.
The second: What to Consider Before Implementing Headless: Web Design for EC Sites
The third: Gatsby-Shopify-Starter Structure Explanation and Plugin Introduction
Fourth: Component Implementation in CSS Module and JSX
The 5th Annual Meeting: Mass Production of Pages Using Templates
Sixth: Acquisition and Output of Information on Shopify with GraphQL
Seventh: OGP, SNS Shares and More Ready for Release
8th: Release (Gatsby Cloud and firebase)
Contents [ hidden display ]
Prerequisite Knowledge and Technology Stack
In this series, we will build headless commerce based on the following technologies.
- Frontend: GatsbyJS
- Backend (EC System): Shopify
- Build & Deploy: Gatsby Cloud
- Hosting: Firebase
* CMS (Contentful) integration is omitted.
Practice requires the following knowledge: Please refer to our official documentation and MDN as appropriate.
- Gatsby (let's finish the official tutorial)
- GraphQL
- Shopify StoreFront API
- JavaScript ES6
- JSX
- React Foundation (*Gatsby consists of React, making it easier to get an overview)
- HTML5 / CSS3(Sass)
- CSS Modules (*CSS in JS is also fine, but this article uses it here).
- yarn or npm
- git(GitHub)
In addition, it will be an explanation based on the Mac environment, so if you are in a Windows environment, please change it as appropriate.
In this first article, we will explain how to build an environment using gatsby-shopify-starter.
We will work with existing Shopify stores to go from Gatsby site to where you can actually buy products.
Building an Environment with gatsby-shopify-starter
Regarding environment construction, Takasaki has written an explanation article before.
It also mentions the reasons for choosing Gatsby, so please help with that:)
https://www.non-standardworld.co.jp/23224/
For an overview of Gatsby, please refer to the Qiita article below.
https://qiita.com/hppRC/items/00739eaf9ae7fc95c1ca
Gatsby installation
If you have finished the Gatsby tutorial, it is a completed step.
The following official guide explains the installation procedures for each Mac/Windows environment.
https://www.gatsbyjs.org/tutorial/part-zero/
Using gatsby-shopify-starter to Create a New Gatsby Site
Well, here's where it comes in.
If you want to integrate Gatsby with Shopify, it is quick to leverage the following gatsby-shopify-starter.
https://www.gatsbyjs.org/starters/AlexanderProd/gatsby-shopify-starter/
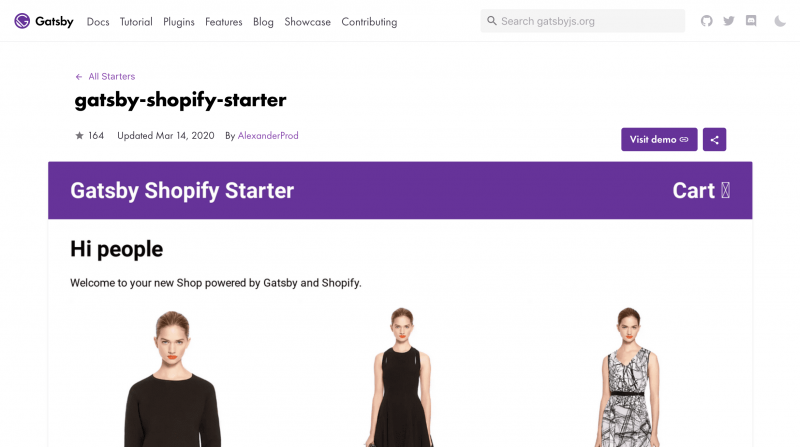
※ you can check out the demo site here. 。
We have already prepared necessary plug-ins and product pages, so we will proceed with development as a starting point.
(*I started off with a different starter, so I decided to go back and investigate and install the necessary plugins.)
Launch the terminal and create a new Gatsby site based on gatsby-shopify-starter by following command.
gatsby new (任意のサイト名) https://github.com/AlexanderProd/gatsby-shopify-starterOnce you’ve built it without any problems, the following message will appear on your terminal:
Your new Gatsby site has been successfully bootstrapped. Start developing it by
running:

  cd (任意のサイト名)
  gatsby develop
go to the directory gatsby develop If you launch the site, you can see the same contents as the demo website of gatsby-shopify-starter at http://localhost:8000/.
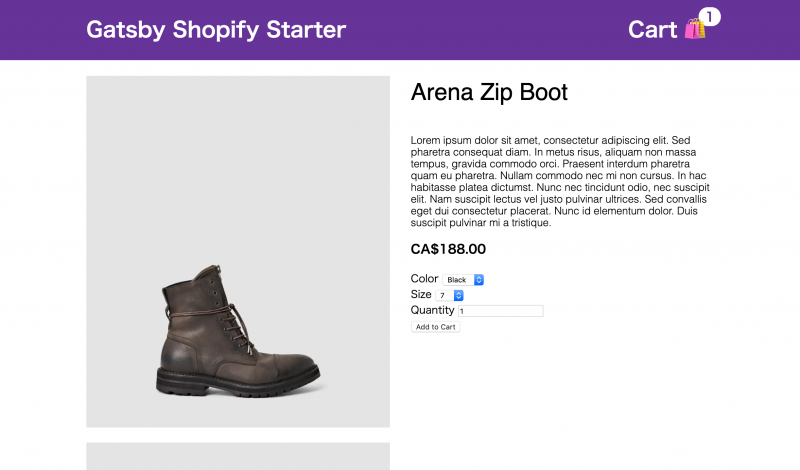
At this point, it is already possible to browse and add carts.
Connecting to Shopify Stores
We are currently tied to a demo store, so we will change the Shopify store that works with it.
(Please close the gatsby site you just launched.)
Enable the Shopify Storefront API
Shopify Storefront access token is required to work with the Shopify store.
For instructions for issuing access tokens, please refer to the relevant section of Takasaki's commentary article:)
https://www.non-standardworld.co.jp/23224/#2ShopifyStorefront_API
.env file update
In gatsby-shopify-starter, the shopify access token is managed by an env file.
SHOP_NAME=xxxxxxxx
SHOPIFY_ACCESS_TOKEN=xxxxxxxxxxxxxxxxx
env file for production and development is created, so change the value of the currently associated demo store to its own Shopify store.
SHOP_NAME should be replaced with the account name of your Shopify store you want to link (the part that is in myshopify.com's coffin), and SHOPIFY_ACCESS_TOKEN should be replaced by the value of the Shopify access token issued earlier.
* Pay close attention so that access tokens are not exposed to the outside world, and make sure your push destination GitHub repository is set up as a priority.
Shopify Integration Checked
once the process is complete, again gatsby develop Launch the gatsby site.
If there is no problem with the settings, you will see what Shopify Stores work together instead of demo store content as shown below.
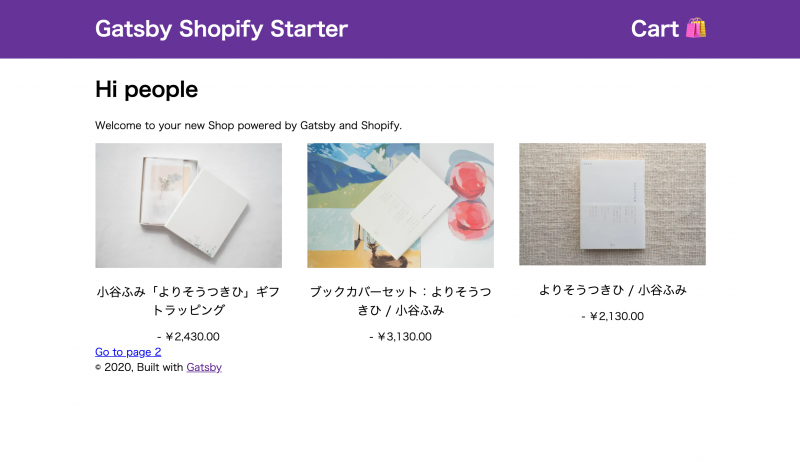
This is the end of environment construction!
If you want to build a site once, or check on the server Applicable part of the article by Takasaki Please refer to it.
Now, if you touch a lot on your local device, you can see that Shopify is already available for purchase at this point.
That said, there’s still a lack of functionality to be released as a headless commerce site: the main visual on top page, header navigation, product branding, cart layout and blog posts.
Let's make it in order.
In the second installment of this series, we will tell you about our headless implementation plan and drop it into a design.
There are many benefits to headless sites, but there’s also a lot of limitations such as not being able to use Shopify third-party apps.. At the beginning of the full-fledged implementation phase, you can make clear what features will be included in your headless site and how (in the case of an existing Shopify store) would replace or give up functionality that was supported by 3rd party applications.
instead
If you have actually tried this process, it may surprise you to say “Oh, environment construction is over with this?”
Gatsby has a wide variety of starters (e. g. for building headless CMS and storybook) besides the gatsby-shopify-starter we introduced here, and one of the key strengths of Gatsby is that it allows you to build your development environment in no time.
If you are not familiar with Gatsby, please use the help of a starter to touch various things and I think it will be fun!
Special Thanks to
Headless Shopify: Lessons Learned Building with Gatsby, Part 1
Headless Shopify: Lessons Learned Building with Gatsby, Part 2
(It's an English article that explains a wealth of insights, including analysis on the benefits and disadvantages of headless sites as well as the speed at which they are displayed. It was very helpful when building a headless site:)
JAMstack official website
Full Introduction to JAMstack: Building a High-Performance Website
(The big benefits of headless sites, "fast" and "secure," are made up of technologies called JAMstack. Besides GatsbyJS, there are many other implementations based on JAMstack, so please take a look at them.)