Building login authentication with Nuxt.js and Firebase Authentication

Hello, I'm engineer Takasaki.
Create a Web Service Using Nuxt.js and Firebase to Get Simple Notes last time js and Firebase Authentication (Login Authentication) for logging in with your Google account.
enable Google login authentication
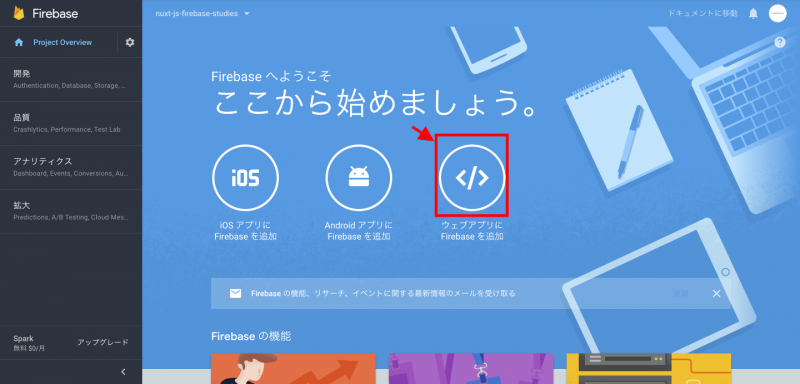
1. Firebase's Console Log in to your account.
Select a project and click the red frame on the top page that will be displayed.
js project back into the folder and create firebase.js in your /plugins folder as follows:
Refer to the screen displayed on 4.2 and change from apiKey ~ messagingSenderId to one of your own projects.
    apiKey: "ここにAPIキーが入ります",
    authDomain: "nuxt-js-firebase-studies.firebaseapp.com",
    databaseURL: "https://nuxt-js-firebase-studies.firebaseio.com",
    projectId: "nuxt-js-firebase-studies",
    storageBucket: "nuxt-js-firebase-studies.appspot.com",
    messagingSenderId: "296913232266"
* Replace the API key with your own.
Open the terminal and deploy your Nuxt.js project.
cd プロジェクトフォルダまでのパスInstall the firebase package.
npm install --save firebasevue and replace the 11th line of .links as follows:
Add the code to import a package for using firebase in line 8.27.
import AppLogo from '~/components/AppLogo.vue'under.
import firebase from '@/plugins/firebase' Added.
Add a function to bind it with the button added in 7 under the 9.31th line of components:
vue file will be completed as follows:
The points here are:
- In the 12th line @click="googleLogin", when a button is clicked, it calls the function registered on the 27th line in the sense of calling "googleLogin".
- line 28, firebase.auth().signInWithRedirect~ is a function that calls the authentication functionality originally available in Google Firebase. This is how we call pre-built features in Firebase with JS. Since it can be used not only on Nuxt.js but also on popular websites, it's easy to incorporate features into your website as needed.
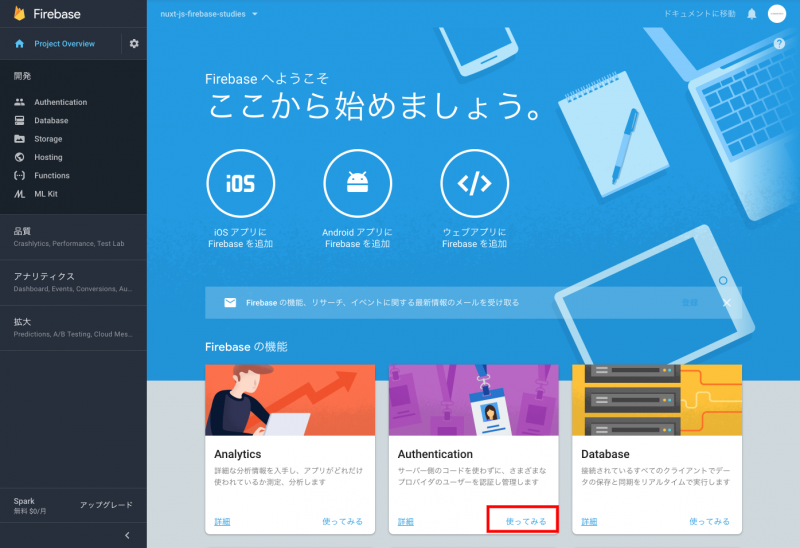
11. Firebase's Console Go to Projects, select a project and click on the red box.
After clicking on “Login Method”, enable Google.
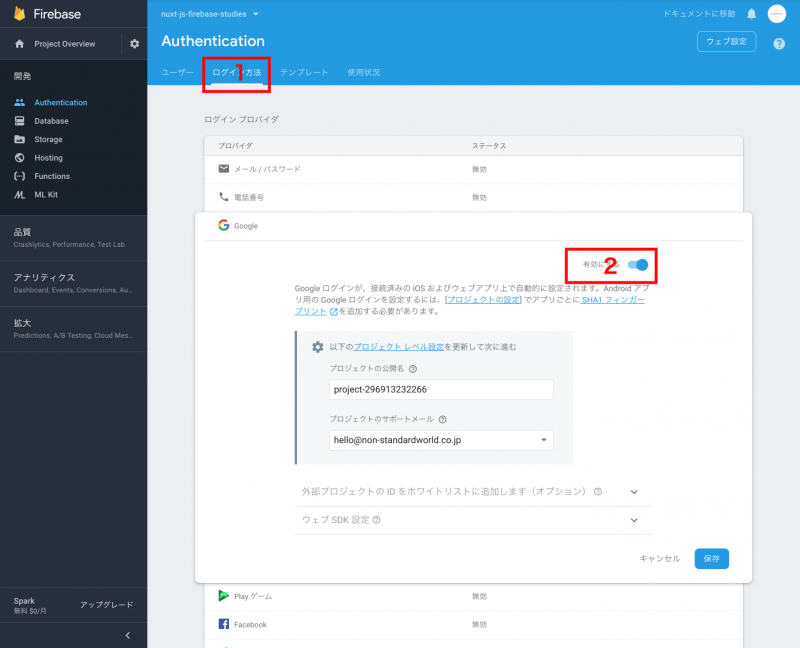
In addition to authentication by Google account, authentication functions such as email, phone number, Facebook, Twitter and GitHub account are also available.
Return to the terminal, expand your project folder and launch a development server using the command below.
npm run dev The following screen appears, and if you press "Login with Google" button at the bottom of the screen, a Google login authentication screen will be displayed.

separate the screen when logged in or not)
As it remains, the screen will not change before and after logging in so I want to separate the screen from when it is not logged in. In Nuxt.js we can separate parts for each part of a website, so I would like to create that part.
vue in the //components folder, prepare a screen for top page before login as follows.
Next, prepare a screen for the top page after logging in as follows under the name Mypage.vue in the same /components folder.
vue and replace the 11th line of .links as follows:
4.
vue, we prepare to read the components before and after logging in.
The completed /pages/index.vue is as follows:
The points here are:
- 24-25, 30-31th rows of components that I've built -- close to PHP or SSI's inclusion -- but you can also pass variables and so on, which is useful for web services and websites where many different parts have to be made.
You can call the registered component with <Component name></Component name> as shown in line 13 and 14. - the ability to use if statements in a template called line 13, line 14 and v-if.
- I have passed the login data of a user obtained in line 14, :user=>~ at line 41 to Mypage component.
- js, which is based on Vue.js by default and the 33rd line asyncData is an event that happens before rendering so we pre-register variables such as login status flags or user data.
- In the 41st line, we are calling a function that monitors login status, which is a feature offered in Firebase.
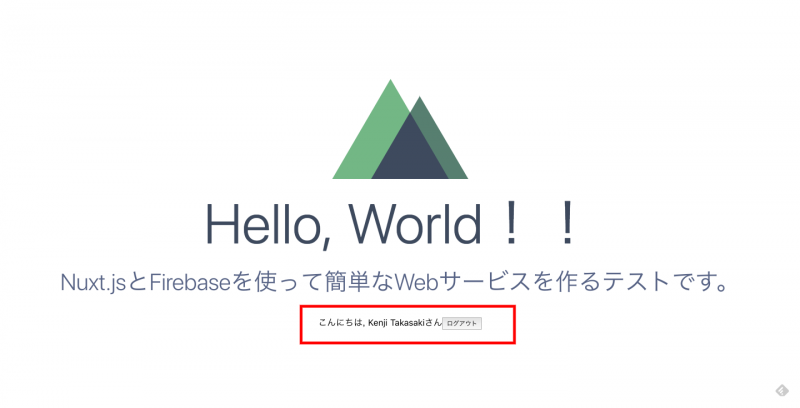
Return to the terminal, expand your project folder and launch a development server using the command below.
npm run dev The following screen appears, and if you press the "Login with Google" button, a Google login authentication screen will be displayed.
How was it?
Also, we have published this file on our GitHub so if you have any questions. here See also.
Next: How to Combine Nuxt.js+Firebase with a Database I'd like to publish an article about .
Thank you very much!
< go on >